How to Rig a Nightcrawler for Walleye
There’s a unique thrill to pursuing walleye in Colorado. These elusive, finicky eaters can be incredibly rewarding to catch, but they often demand a sophisticated approach, especially when it comes to bait. If you've ever felt the frustration of a subtle tap that never turns into a solid hookset, or wondered why your live bait isn't enticing those wary fish, you’re in the right place. This guide is all about mastering the art of rigging a nightcrawler specifically for Colorado walleye, ensuring you present your bait in the most natural and appealing way possible to turn those tentative bites into triumphant catches.
Why Nightcrawlers are a Walleye Angler's Secret Weapon in Colorado
Walleye are cunning, and they didn't get to be such a sought-after game fish by being easy to fool. In Colorado's diverse aquatic environments, from the vast expanses of Pueblo Reservoir to the popular waters of Chatfield and Cherry Creek, nightcrawlers stand out as a consistently effective bait choice. They offer a combination of attributes that walleye find incredibly difficult to resist.
The Irresistible Appeal of Live Bait
Think about it: a living, wiggling nightcrawler in the water is a beacon for a hungry walleye. Its natural movement is something no artificial lure can perfectly replicate. This subtle undulation, even when drifting slowly, mimics prey struggling or moving along the bottom, triggering a primal predatory instinct in the walleye. This natural action is paramount, especially in clearer Colorado waters where walleye have excellent visibility and are more likely to scrutinize their meals.
Beyond movement, the scent trail a nightcrawler leaves in the water is a major draw. Walleye have an acute sense of smell, allowing them to detect prey from a distance, even in murky conditions or low light. As the nightcrawler slowly releases its natural oils and bodily fluids, it creates an olfactory signal that guides walleye directly to your hook. This combination of visual appeal and aromatic invitation makes live nightcrawlers incredibly potent, often outperforming scent-infused plastics when fish are hesitant.
Beyond the Basics: Understanding Walleye Feeding Habits
To truly maximize your success with nightcrawlers, it helps to understand how walleye feed. They are primarily nocturnal or crepuscular (active at dawn and dusk) predators, using their excellent low-light vision to ambush prey. Their lateral line is also highly sensitive to vibrations in the water, allowing them to detect movement even in complete darkness or turbid water. A lively nightcrawler, properly presented, taps into all these senses.
Walleye often feed near the bottom, cruising along ledges, humps, and points, or hunkering down in cover waiting for an opportunity. This means your nightcrawler needs to be presented effectively within their strike zone. Different conditions might call for different presentations: a slow, drifting nightcrawler on a Lindy rig might be perfect for subtle bites on a calm morning, while a faster presentation on a crawler harness could cover more water and trigger reaction strikes during active feeding periods. Understanding these nuances is crucial for turning a simple bait into a walleye magnet, and it will give you a leg up when you're targeting Colorado's Daily Walleye Limit.
Essential Gear for Rigging and Presenting Nightcrawlers
You might think rigging a nightcrawler is simple, and at its core, it is. But having the right gear can elevate your success from occasional bites to consistent action. The subtle differences in rod action, hook type, and sinker choice can dramatically impact how your bait is presented and how well you detect those famously light walleye bites.
Rod, Reel, and Line Considerations
For walleye fishing with nightcrawlers, a medium-light to medium action spinning rod, typically 6'6" to 7'6" in length, is often ideal. The medium-light action provides enough backbone to fight a decent walleye but has a forgiving tip that allows for longer casts with lighter rigs and better bite detection. A fast tip is particularly useful as it will telegraph those subtle "thumps" or spongy feelings that signify a walleye has picked up your bait. Look for rods with good sensitivity, often made with graphite composites, which will help you feel everything happening at the end of your line.
Pairing this with a quality spinning reel in the 2000-3000 size range is a solid choice. Spinning reels excel at handling lighter lines and baits, crucial for presenting nightcrawlers naturally. For line, you have a few options, each with its advantages. Monofilament, typically 6-10 lb test, offers stretch which can be helpful when a walleye slowly takes the bait, preventing them from feeling too much resistance. Fluorocarbon, in similar test weights, is virtually invisible underwater and has less stretch, providing excellent sensitivity. Braid, also 6-10 lb test with a fluorocarbon or monofilament leader, offers incredible sensitivity and strength for its diameter, allowing you to feel the faintest bite. Many anglers find a good selection of these lines and reels readily available on Amazon.
Hooks, Sinkers, and Swivels: The Terminal Tackle
The right terminal tackle is non-negotiable for effective nightcrawler fishing. For hooks, size is critical. Generally, Aberdeen or Octopus style hooks in sizes #4 to #1 work well. Aberdeen hooks are lighter wire, which can be beneficial as they are less likely to tear the nightcrawler, keeping it lively. Octopus hooks, with their slightly wider gap and offset point, provide good hook-up ratios. The specific size you choose often depends on the size of your nightcrawler and whether you're using a whole or half worm. Always opt for sharp, high-quality hooks to ensure solid penetration on those sometimes light walleye bites.
Sinkers are used to get your bait to the desired depth and keep it there. Split shot sinkers are simple for light rigging and can be easily added or removed. Walking sinkers, as the name suggests, are designed to "walk" over the bottom with minimal snagging, making them excellent for Lindy rigs or drift fishing. Bottom bouncers are a heavier, specialized sinker designed to keep your bait just off the bottom while preventing snags, particularly effective when slow trolling or drifting over rocky terrain. Finally, a small barrel swivel, placed above your leader, is essential to prevent line twist, especially when using rigs that spin, like crawler harnesses, or when drifting in current. You can find a wide variety of these essential components, often in convenient multi-packs, when browsing fishing supplies on Amazon.
Specialized Rigs for Colorado Walleye
While the individual components are important, how you put them together creates the "rig." The most classic and effective setup for nightcrawlers is often a variation of the Walleye Walker or Lindy Rig. This rig typically consists of a walking sinker, followed by a barrel swivel, then a 3-6 foot fluorocarbon leader, and finally your hook. The long leader allows the nightcrawler to drift freely and naturally behind the sinker, giving it an incredibly enticing presentation.
Another crucial component, especially for a threaded nightcrawler, is a snelled hook. A snell is a short length of line tied directly to the hook eye, often with a loop at the other end for easy attachment to your leader. Many walleye anglers swear by snelled hooks because they allow the nightcrawler to lie straight and naturally, reducing unnatural kinks that can make the bait look artificial. For faster presentations or when fish are more aggressive, a simple jig head tipped with a nightcrawler can also be deadly. You can even find pre-tied snells and other specialized walleye rig components available through retailers on Amazon, saving you time on the water.
Step-by-Step Guide to Rigging a Nightcrawler for Walleye
There’s more than one way to thread a nightcrawler, and each method has its advantages depending on the conditions, how aggressive the fish are, and the type of presentation you're aiming for. Mastering these techniques will give you versatility and confidence when you’re out on the water.
The "Threaded" Method for Natural Presentation
This method is arguably the most common and effective for a natural presentation, especially when slow trolling, drifting, or using a Lindy rig. The goal is to keep the nightcrawler straight and prevent it from bunching up, allowing it to undulate enticingly in the water.
Here’s how you do it:
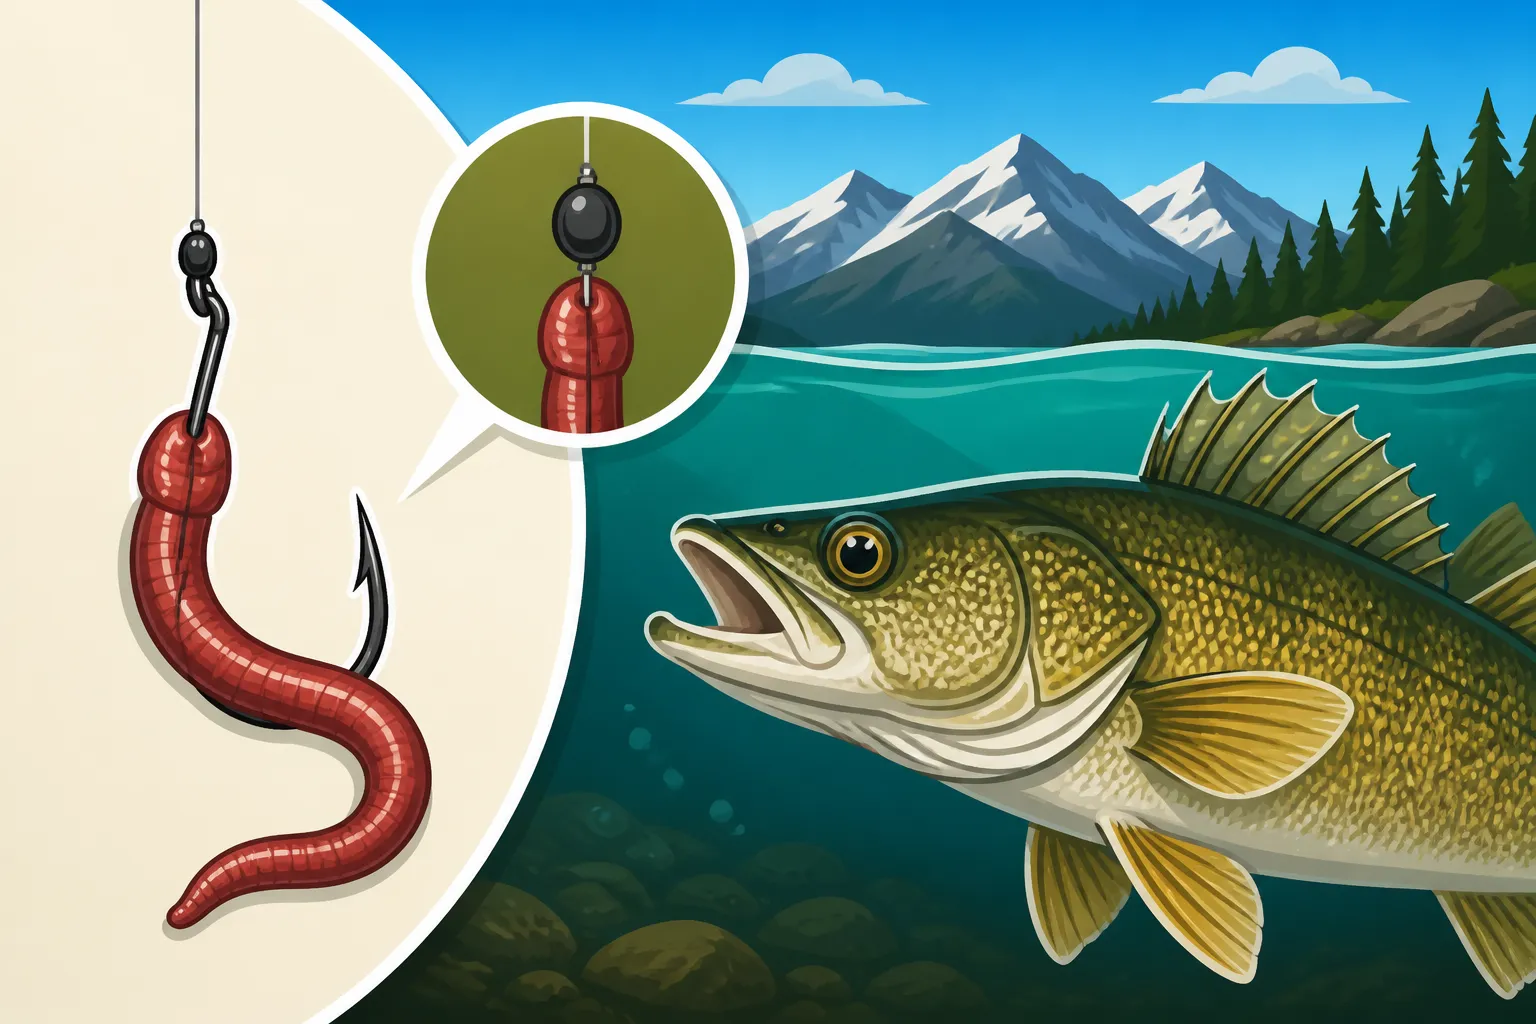
- Start with the Hook Point: Take your hook (an Aberdeen or Octopus hook in size #4 to #1 works well) and insert the point directly into the very tip of the nightcrawler's head. This is the fatter, darker end.
- Thread it Through: Gently push the hook point through the body of the nightcrawler, just enough so the point emerges about a quarter to half an inch down from where you entered.
- Continue Threading: Now, carefully slide the nightcrawler up the shank of the hook, covering the hook eye and knot. You want the hook shank to be concealed within the worm's body as much as possible, leaving only a small portion of the hook exposed near the "head" of the worm.
- Leave a Wiggling Tail: The crucial part is to leave a significant portion of the nightcrawler's tail dangling freely. This unhooked tail is what provides all the irresistible natural movement and scent. If your nightcrawler is very long, you might even pinch off a small piece to ensure a good tail section.
The beauty of this method is that it keeps the nightcrawler securely on the hook, reducing the chances of it being pulled off by weeds or smaller fish. It also minimizes short strikes because the walleye is more likely to inhale the entire worm, leading to a better hookset. This threaded presentation is fantastic for when walleye are finicky and prefer a more subtle, lifelike offering.
The "Wacky" or "Nose-Hooked" Method for Movement
While less common for walleye than for bass, a modified "wacky" or simply nose-hooked method can be incredibly effective, especially when you want maximum, unhindered movement from your nightcrawler or when jigging. This method focuses on creating a lively, squirming presentation.
For a simple nose-hooked approach:
- Hook through the Nose: Take a small, sharp hook (size #6 to #4 Octopus or a specialty wacky hook) and simply pass it horizontally through the very tip of the nightcrawler's head, just behind the small, fleshy collar.
- Exposed Hook: The entire hook shank remains exposed, allowing the nightcrawler to hang and wiggle freely from both ends.
For a true "wacky" style, where the hook is placed in the middle:
- Find the Middle: Locate the approximate middle of the nightcrawler.
- Hook Horizontally: Pass the hook horizontally through the nightcrawler's body at this midpoint. This creates two equally wiggling ends, offering an irresistible, erratic motion as it falls or drifts.
This method is best when actively jigging or casting and retrieving slowly, allowing the nightcrawler to flutter and squirm. It's also excellent when walleye are striking short or "nipping" at the tail, as the hook is more exposed. Just be aware that nightcrawlers rigged this way are more easily dislodged by aggressive strikes or snags.
Combining With Walleye-Specific Lures (Crawler Harnesses)
Sometimes, walleye need a little more flash and vibration to grab their attention, especially when covering large areas or in dingy water. This is where crawler harnesses shine, and Amazon offers a wide selection for your convenience. A crawler harness typically consists of a clevis with a spinner blade (Colorado, Indiana, or willowleaf styles are popular), several beads, and two or three snelled hooks spaced along a leader.
Here’s how to rig a nightcrawler on a harness:
- Hook the Lead Hook: Take the first hook (the one closest to the spinner blades) and insert it into the very tip of the nightcrawler's head, just like the beginning of the threaded method.
- Align the Worm: Gently pull the nightcrawler up the first hook, straightening it out along the line.
- Secure with the Second Hook: Take the second hook and lightly embed it into the body of the nightcrawler, usually about halfway down the worm. For longer nightcrawlers, you might even use a third hook towards the tail. The goal is to keep the nightcrawler stretched out and straight, so it spins correctly with the blade.
The spinner blade on a harness creates flash and vibration, calling walleye from a distance. The nightcrawler provides the natural scent and texture that seals the deal. This combination is particularly effective for trolling or drifting, allowing you to cover vast stretches of Colorado's major reservoirs like Blue Mesa or Pueblo and attract aggressive walleye. This technique is similar to aspects of Trolling Techniques for Colorado Reservoirs.
Presentation Tactics for Maximum Walleye Bites in Colorado
Having your nightcrawler perfectly rigged is only half the battle; knowing how to present it effectively to Colorado walleye is the other. Walleye are often particular about speed, depth, and location. Adjusting your presentation to match their mood and the conditions of the water can drastically increase your catch rate.
Drifting and Slow Trolling
Drifting and slow trolling are incredibly effective methods for covering water and presenting a nightcrawler naturally to walleye. In Colorado's large reservoirs, walleye are often scattered, and these techniques allow you to find active fish.
When drifting, you let the wind or a slight current move your boat, dragging your nightcrawler rig (often a Lindy Rig or Walleye Walker) behind you. The key is to maintain a speed that allows your sinker to occasionally tick the bottom without constantly snagging. If you're moving too fast, your bait might lift too high; too slow, and you're not covering enough ground. You might even use a drift sock or a small electric trolling motor to control your speed precisely. This passive approach often fools wary walleye, as the bait appears to be an easy meal floating along.
Slow trolling involves using your boat's engine or an electric trolling motor to pull your rig at a controlled speed, typically between 0.8 and 1.5 mph. Bottom bouncers are excellent for this, keeping your nightcrawler just off the bottom while the spinner blade on a crawler harness creates an enticing vibration. Pay close attention to your fish finder to identify depth changes, humps, or submerged timber, which are prime walleye hangouts. This method is particularly effective for locating schools of walleye in the deeper sections of reservoirs like Chatfield Reservoir.
Bottom Bouncing and Jigging
Getting your bait to the walleye's preferred depth is paramount, and these techniques ensure your nightcrawler stays in the strike zone. Bottom bouncing is a fantastic way to fish over varied terrain without constantly snagging. As discussed, a bottom bouncer features a wire arm that drags along the bottom, keeping your leader and nightcrawler elevated just above the snags.
To use a bottom bouncer effectively, cast it out and allow it to hit the bottom. Then, slowly retrieve or troll, feeling the bouncer occasionally tap the bottom. The rod tip should be relatively low to the water, and you should be able to feel the bouncer skipping along the substrate. When you feel a bite, don't set the hook immediately. Instead, drop your rod tip back towards the fish to give it a moment to fully inhale the nightcrawler before a firm, sweeping hookset.
Jigging a nightcrawler involves using a jig head with a nightcrawler (often nose-hooked or wacky-rigged) and working it vertically or with short casts. This is particularly effective when walleye are concentrated around structure like submerged trees, rock piles, or ledges. Drop the jig to the bottom, then lift and drop it, creating an enticing up-and-down motion. The nightcrawler's natural movement combined with the jig's action can trigger reaction strikes from even dormant fish. This technique shares some principles with Jigging for Lake Trout Through the Ice, focusing on vertical presentation.
Understanding Walleye Structure and Cover
Walleye are ambush predators that relate heavily to structure and cover. Learning to identify these key holding areas is crucial for placing your nightcrawler where the fish are. Common structures in Colorado's walleye lakes include points extending into the lake, submerged humps (underwater hills), ledges, and sharp drop-offs. These areas provide current breaks, ambush points, and access to deeper, cooler water.
Cover refers to elements like submerged timber, rock piles, weed beds (especially during summer), and even bridge pilings. Walleye will often hug these features, using them for protection from light and as staging areas to dart out and grab passing prey. Use your fish finder or consult a detailed map (many of which are available on Amazon or through tools like Colorado's Fishing Atlas to locate these prime spots. Once you’ve identified promising structure or cover, you can then deploy your preferred nightcrawler rig – perhaps slow trolling a crawler harness along a contour line, or jigging a nose-hooked nightcrawler directly over a specific rock pile. Knowing where the fish are hiding is the ultimate secret to consistent walleye success in Colorado.
Common Mistakes and Troubleshooting When Using Nightcrawlers
Even with the perfect rig and knowledge of presentation, walleye can still be a challenge. It’s easy to get frustrated when bites are scarce or when you feel bites but can't seem to hook up. Understanding common pitfalls and how to troubleshoot them can make all the difference on a tough day in Colorado.
Avoiding Short Strikes and Missed Fish
One of the most common frustrations with walleye is their tendency for "short strikes" or incredibly light bites. They might gently mouth the bait, or you’ll feel a subtle "tick" that doesn't develop into a full take. The biggest mistake here is setting the hook too quickly. Walleye often pick up the tail of the nightcrawler first, moving it around in their mouth before fully inhaling it.
When you feel that first subtle tap, resist the urge to immediately set the hook. Instead, drop your rod tip slightly towards the water or feed a little line. Count to two or three slowly, giving the fish time to fully commit to the bait. Then, lift your rod in a firm, sweeping motion to set the hook. If you're consistently getting short strikes, consider using a slightly smaller hook or trimming down your nightcrawler to ensure more of the worm is within the walleye's mouth when it takes it. Also, ensure your hooks are razor-sharp. A dull hook will simply slide off the tough mouth of a walleye, no matter how good your hookset.
Dealing with Snags and Lost Bait
Fishing near walleye habitat often means fishing near structure, which, unfortunately, also means snags. Losing tackle and bait can be frustrating and costly. One way to minimize snags is to use lighter bottom bouncers or walking sinkers that are just heavy enough to maintain bottom contact. If you’re constantly getting hung up with a 1-ounce bouncer, try dropping to ¾ or ½ ounce if conditions allow.
Another strategy is to learn the contours of the bottom. By knowing where drop-offs and rock piles are, you can slightly lift your rod tip or momentarily speed up your retrieve to guide your rig over potential snags. When trolling or drifting, varying your distance from the bank or changing your depth slightly can help. If you do get snagged, try changing your angle of pull. Sometimes moving the boat directly over the snag or pulling from a different direction can free your rig. Keeping your nightcrawlers lively also reduces lost bait; a dead or limp worm is more prone to snagging compared to a firm, wriggling one.
Maintaining Healthy Nightcrawlers
A lively nightcrawler is a far more effective nightcrawler. Walleye are attracted to movement and fresh scent, so ensuring your bait is in top condition is crucial. Poorly stored nightcrawlers become sluggish, discolored, and less appealing to fish.
Proper storage starts with good bedding. Use a quality worm bedding material, typically available at bait shops or even through Amazon, that provides the right moisture and nutrients. Keep your nightcrawlers cool – ideally between 40-50°F (4-10°C). Many anglers use a small cooler with ice packs to maintain this temperature, especially on hot Colorado days. Avoid direct sunlight. Ensure the container is breathable; specialized worm containers have ventilation holes to prevent suffocation. Never store them in standing water, as this can drown them. Regularly check your bedding for dead worms and remove them to prevent contamination. The healthier and more active your nightcrawlers are, the better their chances of attracting and hooking that trophy walleye.
| Rigging Method | Description | Pros for Walleye | Cons for Walleye | Best Use Cases in Colorado |
|---|---|---|---|---|
| Threaded | Hook threaded through the worm, leaving a long wiggling tail. | Natural presentation, secure bait, reduces short strikes. | Less action than wacky, takes a moment to rig. | Drifting, slow trolling, Lindy rigging in clear to moderate water. |
| Nose-Hooked / Wacky | Hook passed through the worm's head or middle, both ends wiggle freely. | Maximum natural movement, highly enticing to active fish. | Less secure bait, more prone to short strikes if hook is too exposed. | Jigging, casting and slow retrieving, when fish are aggressive. |
| Crawler Harness | Nightcrawler stretched on multi-hook rig behind spinner blades. | Adds flash & vibration, covers water quickly, strong scent. | Less natural movement than unencumbered bait, can be over-stimulating for finicky fish. | Trolling, fast drifting in larger reservoirs like Blue Mesa or Pueblo. |
Disclaimer
Fishing regulations, license requirements, and local conditions in Colorado can change. Always consult the most current Colorado Parks and Wildlife (CPW) regulations before heading out. This guide is for informational purposes only and does not supersede official regulations.