How to Fish a Nymph Under an Indicator
There's nothing quite as frustrating as watching seasoned anglers pull fish after fish from a river you're struggling on, especially when you know the fish are there, just not biting your dry flies. Many times, the secret isn't a magical fly, but rather a proper nymphing setup. This comprehensive guide will walk you through the ins and outs of fishing nymphs under an indicator, helping you master this incredibly effective technique for Colorado's diverse waters.
Understanding the Nymphing System: Why Indicators Work So Well
Let's be real, most of the time, trout aren't looking up for bugs on the surface. They're down deep, rummaging around on the bottom or cruising through the water column, feasting on the abundant aquatic insect life. That's where nymphing comes in, and specifically, nymphing with an indicator. It's a game-changer for consistently catching fish.
The Philosophy Behind Nymphing
Imagine you're standing in a beautiful Colorado river, perhaps a popular stretch of the South Platte or a smaller freestone stream. You might see a few caddis or mayflies fluttering around, maybe even a trout rise occasionally. But for every one insect you see on the surface, there are hundreds, if not thousands, of nymphs, larvae, and pupae living their lives underwater. These are the primary food source for trout for most of the year. Trout are opportunistic feeders, and they expend energy most efficiently by eating what's most readily available. That's almost always nymphs.
The real challenge with nymphing isn't just getting your fly down there; it's knowing when a fish has actually eaten it. Unlike dry fly fishing where you see the take, a subsurface strike can be incredibly subtle – a slight pause, a tiny twitch, or just a feeling of added weight. Without a good system, you might miss a dozen fish for every one you hook, leaving you scratching your head and feeling defeated. This is where an indicator becomes absolutely indispensable.
How an Indicator Becomes Your Eyes Underwater
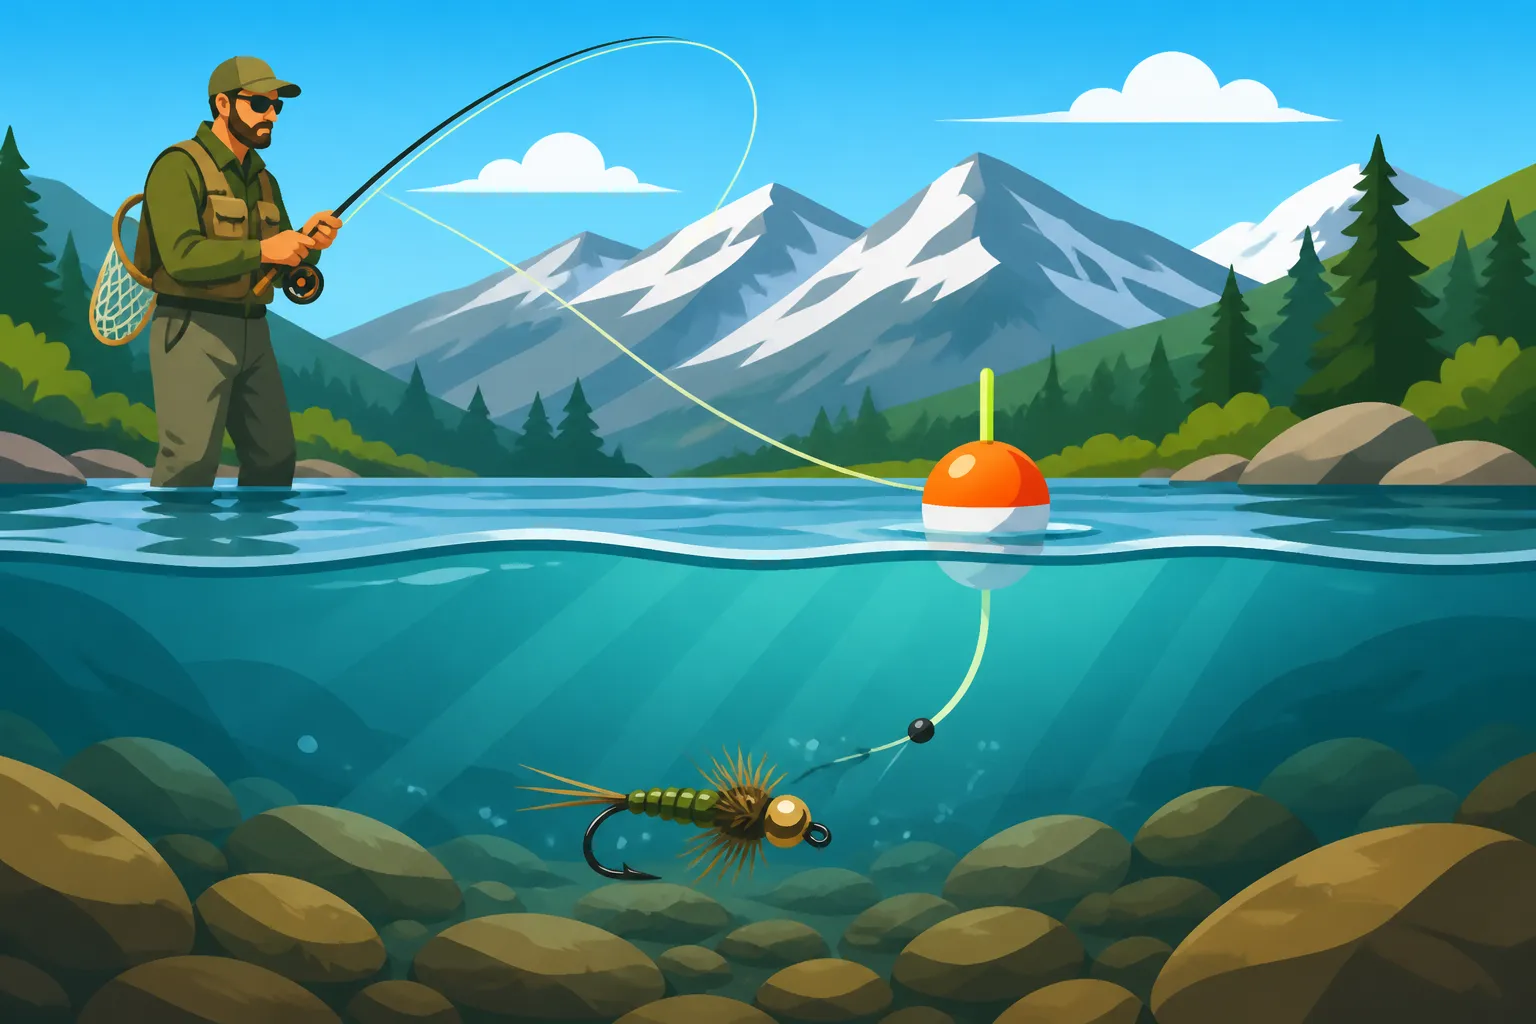
Think of your indicator as a highly sensitive fishing buoy, or rather, your eyes looking directly at your nymph in the water. It floats on the surface and signals even the most delicate of takes, transforming the guesswork into a visual cue. When a trout mouths your nymph, the indicator will do something, anything, out of the ordinary: it might dip slightly, stop its drift, move sideways, or even slowly pull under. Learning to read these subtle movements is the key to unlocking consistent nymphing success.
There are many types of indicators out there, each with its own pros and cons, and they really shine in different situations on Colorado's varied waters. You have everything from delicate yarn indicators to larger foam models, and even some clever pinch-on designs. For example, smaller, sensitive yarn or sticky-back foam indicators are fantastic for spooky fish in clear, slow-moving tailwaters like parts of the Fryingpan River, where subtlety is paramount. They absorb water, becoming nearly weightless and land softly, minimizing splash. However, they can be harder to see in choppy water or at a distance.
Larger, more buoyant foam indicators, like a classic Thingamabobber or Airlock Strike Indicator, are excellent for faster, deeper water, or when you're casting multiple nymphs with plenty of split shot to get them down. They offer superior buoyancy and are highly visible, which is great when you're battling glare or trying to track your drift across a wide river. The downside is they can land with more of a "plop," potentially spooking nearby fish in very calm or shallow water. There are also pinch-on indicators that slide directly onto your leader, allowing for quick depth adjustments without damaging the line, which can be super convenient. Knowing which one to choose often comes down to the specific conditions you face, but having a few options on hand is always a good idea. You can find a wide variety of these on Amazon, often in multi-packs, making it easy to experiment.
| Indicator Type | Best Use Case | Pros | Cons |
|---|---|---|---|
| Yarn Indicator | Clear, slow water; spooky fish | Very sensitive, soft landing, adjustable | Can get waterlogged, harder to see in chop |
| Stick-on Foam | Delicate presentations, shallow to medium depth | Very light, minimal splash, highly sensitive | Less buoyant for heavy rigs, single-use, less durable |
| Pinch-on Foam | Quick depth adjustments, medium currents | Easy to move, reusable, decent buoyancy | Can kink leader if overtightened, less sensitive |
| Thingamabobber | Fast, deep water; heavy rigs; high visibility | Highly buoyant, very visible, durable | Can spook fish with splash, less sensitive to subtle takes |
| Sighter/Leader Material | Technical nymphing, no indicator above water | Most sensitive, very subtle presentation | Hardest to see, requires practiced eye, no visible "take" |
Setting Up Your Nymph Rig for Colorado Waters
Getting your rig right is crucial for success. It's not just about tying on a few flies; it's about creating a system that allows your nymphs to drift naturally at the correct depth, presenting them enticingly to hungry trout. A properly constructed rig is balanced, efficient, and adaptable to the ever-changing conditions you'll encounter on the river.
Rod, Reel, and Line Selection for Nymphing
When it comes to nymphing in Colorado, your rod, reel, and line are your foundational tools. While you can nymph with almost any fly rod, certain characteristics make the job much easier and more effective. For most of Colorado's rivers, especially our famed tailwaters and freestone streams, a longer rod is a huge asset. Think a 9-foot to 10-foot rod, in a 4-weight or 5-weight. The extra length gives you unparalleled reach for mending your line, allowing you to control your drift over conflicting currents and keep your indicator and nymphs tracking naturally. This reach is particularly beneficial on wider rivers or when trying to fish around obstacles. A medium-fast action rod is generally preferred, as it offers enough backbone for casting weighted rigs and fighting strong trout, but still has enough flex in the tip to protect light tippets during hooksets.
Your reel needs to match your rod for balance, and for nymphing, it largely serves as a line storage device and a drag system for fighting fish. Don't overthink it, but make sure it's reliable. As for your fly line, a weight-forward floating line is almost always the way to go for indicator nymphing. The floating line allows your indicator to stay on the surface and gives you the ability to mend effectively. The weight-forward taper helps punch through wind and cast those sometimes heavy nymph rigs. If you find yourself frequently fishing very heavy rigs or in extremely windy conditions, you might even consider a line that's a half-size heavy for your rod, like a 5-weight line on a 4-weight rod, to help with turnover.
Building the Leader and Tippet System
The leader and tippet are the invisible connection between your fly line and your nymphs, and their construction is critical for proper presentation. A typical leader for indicator nymphing will be 9 to 12 feet long, starting with a thicker butt section and tapering down to a finer tip. Many anglers prefer a knotless tapered leader from a brand like Rio or Scientific Anglers, as they are strong and turn over well. The length you choose will depend on the depth of the water you're fishing; generally, you want your leader to be at least as long as the water is deep, often 1.5 times the depth, to allow your nymphs to sink properly before your indicator.
At the end of your tapered leader, it’s a good idea to tie in a small tippet ring. This tiny metal ring acts as a connection point, allowing you to attach your tippet without repeatedly cutting back into your expensive tapered leader. It also creates a strong connection point that's less prone to knot failure. From the tippet ring, you'll attach your tippet. Fluorocarbon tippet is often preferred for nymphing because it's nearly invisible underwater, sinks faster than monofilament, and is incredibly abrasion-resistant, which is a huge plus when your flies are bouncing along rocky bottoms. Depending on the size of your nymphs and the water conditions, you'll typically use 4X to 6X tippet. If you're targeting larger fish in heavy current or with bigger flies, 4X might be appropriate. For smaller flies and more finicky fish in clear water, 5X or even 6X will be necessary. Remember, the lighter the tippet, the more natural your drift will be, but also the easier it is to break a fish off. Balancing these factors is a learned skill. For a deeper dive into setting up your subsurface rig, you might want to check out our guide on How to Set Up a Nymph Rig for a Deep Tailwater Run.
Attaching Nymphs and Adding Weight
Now for the business end: your nymphs and the weight to get them down. The choice of nymph patterns is incredibly diverse in Colorado, mirroring the rich insect life in our rivers. Classic patterns like Pheasant Tails, Hare's Ears, Princes, and Copper Johns are always good starting points. However, it's smart to carry a variety of patterns that imitate local insects, such as stoneflies, caddis larvae, midges, and various mayfly nymphs (like Baetis or Green Drakes). Having a solid selection of these, in various sizes and colors, will allow you to "match the hatch" even when fishing subsurface. Our Best Flies for Colorado's Gold Medal Trout Water article offers some excellent suggestions for specific patterns.
Many successful nymphing setups involve a two-nymph rig. This gives you the advantage of offering two different patterns or sizes, increasing your chances of finding what the fish are keying in on. The first nymph, often called the "point fly," is tied to the end of your main tippet. Then, you'll tie a second nymph, the "dropper," to a short piece of tippet (usually 10-18 inches) off the bend of the point fly's hook. This creates a natural presentation where one nymph follows the other, mimicking a dislodged insect or a different stage of life.
The most critical component for effective nymphing is often overlooked by beginners: getting your flies deep enough, fast enough. This usually requires adding weight. Tungsten-beaded nymphs certainly help, but often you'll need additional split shot. The amount and placement of split shot are vital. You want just enough weight to get your flies to the bottom without dragging excessively or snagging constantly. A good rule of thumb is to place one or two small split shot (or a small amount of tungsten putty) roughly 6-12 inches above your first nymph. This allows your flies to drift more naturally, almost suspended behind the weight, rather than plummeting unnaturally. The current speed and depth will dictate how much weight you need. On fast, deep rivers, you might need surprisingly heavy shot. For more detailed advice on this, you can refer to our guide on What Split Shot Size Works Best in Fast Colorado Currents. Remember, when you're buying split shot, a variety pack from Amazon can be incredibly useful to have on hand for adapting to different conditions.
Essential Techniques for Effective Indicator Nymphing
Once your rig is built, it's time to put it to work. Nymphing with an indicator isn't just about casting and waiting; it's a dynamic dance of casting, mending, and keen observation. Mastering these techniques will transform your catch rates from occasional luck to consistent success.
Casting and Presentation
Casting a weighted nymph rig with an indicator is quite different from delicately presenting a dry fly. Forget those graceful overhead loops; with nymphs, you're usually employing a more controlled "lob" cast or a water-load cast like a roll cast. The goal is to avoid tangles (which are incredibly common with multiple flies and split shot!) and to land your indicator and flies gently, but accurately, upstream of your target zone.
Start by ensuring you have enough line out so that your indicator is hanging roughly a rod's length from your rod tip. Then, lift your rod tip high, bringing your leader and flies out of the water. With a smooth, deliberate motion, push your rod forward, letting the weight of the flies and indicator carry the line forward in a broad arc. It's less about speed and more about a controlled, pendulum-like motion. As the rig approaches its target, "cushion" the cast by slightly pulling back on the rod, allowing the indicator to settle softly on the water. You want your indicator to land first, or simultaneously with your flies, approximately 6-10 feet upstream of where you believe the fish are holding. This gives your nymphs crucial time to sink to the appropriate depth before they reach the fish. Minimizing slack as your flies hit the water is also important, as it gives you immediate contact and better strike detection.
Achieving a Drag-Free Drift
This is, without a doubt, the most critical aspect of effective nymphing. A drag-free drift means your flies are moving at the exact same speed as the natural current, making them appear completely natural to a feeding trout. Any unnatural drag will cause your flies to "skate" or accelerate unnaturally, signaling to a trout that something isn't right.
The primary tool for achieving a drag-free drift is called "mending." After your cast, as your line begins to drift downstream, you'll often notice your fly line forming a bow in the current, pulling your indicator and flies along at an unnatural speed. To counteract this, you'll "mend" your line. This involves lifting your rod tip and flipping a loop of line upstream of your indicator, essentially throwing the belly of your line back into the slower current. This allows your indicator and nymphs to continue drifting at the natural speed of the water. You'll often need to mend multiple times during a single drift, especially on rivers with complex current patterns like the Arkansas River or parts of the Colorado River. It's a continuous process of watching your indicator, reading the water, and adjusting your line.
Another technique is "stack mending," which involves lifting your rod high and flicking several small mends of line on top of each other, creating a stack of line upstream of your indicator. This buys you precious extra seconds of drag-free drift in tricky currents. Remember, your leader length also plays a significant role here; a longer leader helps to absorb conflicting currents between your fly line and nymphs, making it easier to achieve a natural drift. For a deep understanding of how currents affect your presentation and where to position your flies, our article on Reading Water on a Colorado Freestone River is an invaluable resource.
Detecting Takes and Setting the Hook
This is where the indicator truly shines and where many new nymphing anglers get frustrated. Trout takes on nymphs are rarely aggressive tugs. More often, they are incredibly subtle. Your indicator is your sole window into what's happening subsurface, and you must treat any abnormal movement as a potential take.
Reading the indicator:
- The Pause: Your indicator suddenly stops its downstream drift, even for a split second, while the rest of your line continues to move. This almost always means a fish has eaten your fly.
- The Dip or Bob: Your indicator dips or bobs unnaturally, either sinking slightly or twitching. Even a tiny dip is a sign.
- Sideways Movement: Your indicator moves suddenly sideways, out of its natural current lane.
- Accelerated Movement: Your indicator suddenly speeds up unnaturally, often caused by a trout turning and swimming quickly with your fly.
- Subtle Stop: The indicator just… doesn't move. Everything around it is drifting, but your indicator is static. This often means your nymphs are in a fish's mouth.
When you see anything out of the ordinary, set the hook! Don't hesitate. Many experienced nymphers live by the "two-second rule": if your indicator does anything weird for more than two seconds, it was probably a fish. You're better off setting the hook on a snag or a false alarm than missing a trout. When setting the hook, use a sharp, upstream sweep of the rod, rather than a violent yank. This "trout set" helps protect your light tippet and minimizes the chance of breaking off a fish. In contrast to a strip set often used for streamers, the trout set ensures you're reacting to the indicator's movement directly.
Reading Water and Adapting Your Approach
Successful nymphing isn't a static technique; it's a dynamic art that requires constant observation and adaptation. Colorado's rivers are incredibly diverse, from broad, slow tailwaters to raging freestone torrents, and what works in one spot might fail spectacularly in another. Learning to read the water and adjust your setup and presentation is key to becoming a truly effective nymph angler.
Where Trout Hold and Feed
Trout are constantly looking for two things: food and cover, preferably in the same spot. When nymphing, you're trying to put your flies where they're most likely to be feeding. This means understanding where trout position themselves in the current.
- Seams: These are the lines where fast water meets slow water. Trout love to sit in the slower current, expending minimal energy, while waiting for food to drift by in the faster water. Your goal is to drift your nymphs right down these seams.
- Eddies and Backcurrents: Areas where the current swirls and reverses can be prime holding water, especially for larger fish. Nymphs often get trapped in these areas, making them easy pickings.
- Deep Pools: While often slower, deep pools can hold significant numbers of trout, especially in winter or during bright, sunny conditions when fish seek refuge from light and predators. You'll need extra weight and a longer leader to get your flies down into these depths.
- Riffles and Runs: These oxygenated, faster-moving sections often hide plenty of food. Trout will hold behind rocks, logs, or in depressions on the bottom, darting out to grab passing nymphs. Don't let the choppy surface fool you; these can be incredibly productive spots.
- Current Breaks: Anything that breaks the current – a large boulder, a log jam, a submerged shelf – creates a haven for trout. Position your drifts to go just upstream of these features.
Understanding how trout position themselves to intercept food is vital. They'll almost always face upstream, waiting for nymphs to tumble down with the current. This means your flies should also approach them from an upstream direction, mimicking a natural drift. For more specific insights into trout behavior in different water conditions, our guides on Where Trout Hold During High Water and Where Trout Hold During Low, Clear Water offer detailed explanations.
Adjusting Depth and Weight
The precise depth at which your nymphs are drifting is perhaps the most critical factor in nymphing success. Too shallow, and fish won't see them. Too deep, and you'll be constantly snagging the bottom (though, if you're not occasionally snagging, you're probably not deep enough!).
A general guideline is to set your indicator so that the distance from the indicator to your bottom nymph is roughly 1.5 times the depth of the water you're fishing. For example, if you're fishing in 4 feet of water, you'd set your indicator 6 feet above your deepest fly. This allows your flies to get down near the bottom where most of the feeding happens, but still gives you enough clearance to avoid constant snags.
However, this "rule" is just a starting point. You'll need to constantly experiment. If you're not touching the bottom occasionally, add more weight or increase the depth setting. If you're snagging every other cast, lighten your weight or shorten the leader to your indicator. Changes in current speed and water depth will require immediate adjustments. For instance, during Colorado's spring runoff, when rivers are high and fast, you'll need significantly more weight and a higher indicator setting to get your flies down. Our article When Colorado's Spring Runoff Hits and How to Fish Around It delves deeper into fishing these challenging conditions. Conversely, during low, clear flows in late summer, you'll want to reduce weight and use a more subtle approach.
Remember to consider where the fish are holding in the water column too. Sometimes, trout are suspended mid-column, actively feeding on emerging insects. In these cases, you might intentionally set your indicator shallower to target those specific depths.
Common Challenges and Troubleshooting
Nymphing isn't always smooth sailing, and you're bound to run into challenges. Learning how to troubleshoot on the fly (pun intended!) will save you a lot of frustration.
- Wind: Colorado is famous for its afternoon winds, especially in open areas or on large reservoirs. Wind makes casting weighted rigs a nightmare and creates line belly that causes immediate drag. To combat wind, try shortening your leader and tippet slightly to improve turnover. Cast with a tighter loop, keep your backcast low, and use the wind to your advantage if it's coming from behind you. On extremely windy days, it's sometimes best to switch to a more streamlined technique like Euro nymphing or focus on more sheltered stretches of the river. You can also explore How Wind Affects Fishing on Colorado's High Lakes for more specialized advice.
- Snags: If you're constantly getting snagged on the bottom, it means your flies are too deep or you have too much weight. Reduce your split shot, or slide your indicator up the leader a bit to shorten the distance to your nymphs. Sometimes, a gentle "wiggle" of the rod can free a snagged fly without breaking off.
- Spooking Fish: In clear, shallow water, trout are incredibly wary. A heavy splash from your indicator or an errant cast can send them scattering. To avoid this, use a smaller, softer-landing indicator (like yarn), shorten your casting distance, and approach the water cautiously. Our guide on How to Approach a Tailwater Without Spooking Trout offers excellent tips for stealthy fishing.
- No Bites: If you're not getting any action, it's time to systematically change things up.
- Depth/Weight: Are your flies getting to the correct depth? Adjust your indicator and split shot.
- Drift: Is your drift truly drag-free? Focus on your mending.
- Flies: Are you using the right patterns? Switch out one or both nymphs. Try a different size or color. If you know what's hatching, or what's usually abundant in that water, try to match it. Sometimes even a subtle change in color can make a huge difference, particularly on highly pressured waters. Learning Matching the Hatch on Colorado's Tailwaters can significantly improve your fly choice.
- Location: Are you fishing in the right spots? Move upstream or downstream, try different types of water (seams, pools, riffles). Don't get stuck in one spot if it's not producing.
Nymphing under an indicator is a highly effective, incredibly rewarding way to fish in Colorado. It takes practice, patience, and a willingness to adapt, but once you get the hang of it, you'll find yourself unlocking a whole new level of fly fishing success on our beautiful waters. Don't be afraid to experiment, learn from every cast, and most importantly, enjoy the process.
Disclaimer
The information provided in this guide is for general informational purposes only and does not constitute legal or professional advice. Fishing regulations, license requirements, and local conditions in Colorado can change frequently. Always consult the most current Colorado Parks and Wildlife regulations and local advisories before heading out to fish. The use of any fishing techniques, gear, or locations is at your own risk.